
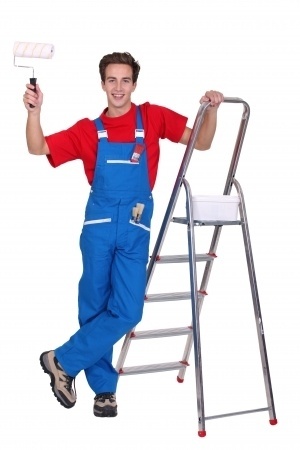
 Tap your Inner Leonardo
A garage door can last a long time, especially if well maintained. Not only does that include the semi-annual lubing of the springs, pulleys and tracks, but also the occasional paint job. It’s a cheap way to give your garage a new look as well as maintaining it for years to come. But before you break out the roller and go to town, use this guide to get the job done right. That way, you’ll only have to do it once.
Scheduling
We all have important daily schedules to follow for work and for play. A garage door painting project is no different—it needs to be painted on a tight schedule as well. Pick a day when rain chances are low. Also, take the whole day off for the painting project and start in the morning when temperatures aren’t too hot or too cold. This way, you’ll have plenty of time to paint so you’re not rushing and are forced to clean up paint supplies in the dark.
Prep
 Preparation is Key to Succcess
This part is always the most dreaded part of the project, but it must be done. Any peeling paint must be stripped away. Rough spots will need to be sanded down and any dents or holes filled. Check for rust problems on metal doors or rotten areas on wooden doors. It could be a sign that your garage door needs to be replaced.
On wooden doors, check for mold, especially on the inside. Mold needs to be physically removed with a scraping tool and afterwards, the affected area needs to be soaked with a powerful disinfectant such as hydrogen peroxide. Mold mitigation is probably best left to a professional, given the inherent dangers of breathing mold spores which are kicked up during removal.
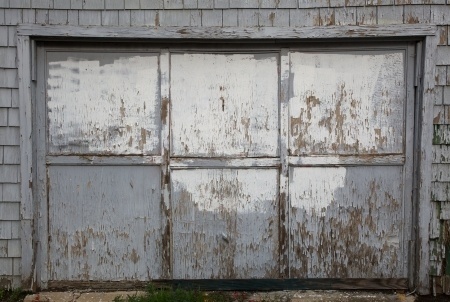 Old Garage Door Needs Replacement, Not Painting
Jim Norman of Overhead Door Company of Central Jersey had this to say about garage door painting preparations: “Always clean the door well and prep it before painting. An old wood door may be better off being replaced if the door is rotting or deteriorating.” Once you’ve inspected the door for damages and you’ve got the old paint taken care of, clean the door with a bit of water and a soapy sponge—just like you would use to wash your car. A stiff bristled brush with a telescopic handle can help you to reach the high spots on the door and the surrounding trim. Let the door dry thoroughly before moving to the next step.
Taping Off
There is nothing worse than spilling paint on a driveway. Be sure to open your garage door, lay down a drop cloth, and close the garage door. Never use plastic on the ground when painting as this can be dangerous if paint spills on the slippery surface. If you don’t want to purchase a drop cloth, go for a few pieces of old cardboard instead.
Using painters tape, tape off the plastic/vinyl seals that surround your garage door. You may want to add a bit of painter’s paper around the trim to prevent any stray brushstrokes, if you’re not exactly Leonardo Da Vinci with a paint brush.
Prime
It’s a good idea to use primer on a metal door. If you’re painting an already painted wood door, it’s ok to skip this step and just apply the paint, unless you’re going for a really drastic color change. Be sure that the primer you use is suited for outdoor use.
Apply the paint in thin layers around the raised and sunken profiles of the door first, with a brush. Use a roller to paint the flat panels of the door. Be sure to catch any drips from the corners and roll out any lines left from the brush or roller strokes. Allow the primer to dry for at least four hours before moving to the next step.
Paint
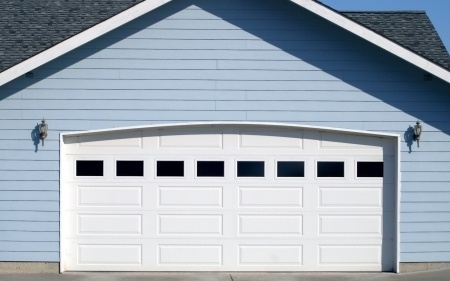 Beautifully Painted Garage Door
Apply your favorite color of latex-based exterior paint onto the door with a brush, first around profiles in the door. Use a small roller to cover the larger, flatter surfaces of the door and to cover any brush strokes, drips or other paint imperfections. Let it dry for two hours and then apply the next coat of paint. Allow the second coat to dry for two more hours and then apply the third and final coat. Peel away the painters tape carefully once the paint has dried. You may need to gently use a razor knife to carefully cut the tape free from the paint. Clean up all brushes, rollers and any other mess before calling it a day.
And voila, you’ll be hailed as a hero by your family for improving the exterior look of the house, while not breaking the budget. You’ll also have the satisfaction of knowing you’ve extended the life of your house’s largest moving object.